

Updated March 2026
Kimchi has become something of an international sensation in the last few years. And with people all over the world “discovering” it, and adding their own touches, I’ve seen everything from Kimchi Toast to (heaven help us) Kimchi Ice Cream. No doubt, I’m sure a Kimchi frappuccino is right around the corner. But at its heart, kimchi still remains what it has always been- fermented spicy vegetables, a Korean staple, and a shining example of Asian funky deliciousness. Radish Kimchi is a fast, flavorful, and exciting condiment.
Let my Radish Kimchi recipe show you how easy it is to make authentic kimchi at home, even if you’ve never tried your hand at pickling or fermenting before. Radish Kimchi is packed with probiotics (which we’re all supposed to be eating more of), quick to prepare, and only gets better with age. This recipe has been our most popular, most searched recipe- year after year.
A Twist On A Classic
Traditionally, radish kimchi is pickled either using whole baby sized radishes with their stems or cubed. I prefer shredded radish because I use my radish kimchi in a lot of different ways (coming soon!) such as a topping for ramen, mixed into salads, and as a condiment for rice bowls; therefore, I find the shreds to be more versatile. Plus, the thin shreds means that the fermenting process happens more quickly, and who wouldn’t want to eat it as soon as possible?
Let’s Get Fermenting!

Key Ingredients
Korean Red Pepper Flakes
While you can make a kimchi with just about any vegetable (or fruit) you can think of, there is one ingredient that is indispensable. Gochugaru, or Korean red pepper flakes, really have no substitute. Gochugaru is ground to a light coarse consistency and gives kimchi its characteristic bright red hue. It can range from mild (which still has heat) to hot. I use hot at home, because we all love spicy foods. But if you are worried about the heat level, and it will get spicier as it ferments, choose a mild one. I suggest getting milder chili flakes rather than using less because you will lose the bright red color characteristic of kimchi if you cut down on the quantity of the chili pepper.
When purchasing gochugaru, choose one that has a bright red color (not a dull reddish brown) at a store where you know there’s a lot of turnover on the product. You want the freshest bag you can find. Furthermore, it is important that you purchase the flakes and not the finely milled powder, which looks like cayenne, and is used in making Gochujang, the hot pepper paste.
Sometimes, the translation on the package may be inaccurate so take a peek through the window on the package and confirm that you see chili flakes. Although purchasing at a Korean grocery store is best and least expensive, if you have none in your area, Tae-kyung is a brand widely available online.
Korean Radish
Korean radish is a large, mild white radish used in all kinds of dishes including soups and side dishes. It is shorter and rounder than daikon, but either can be used for this radish kimchi. I start by peeling it:

Then I make thin slices:
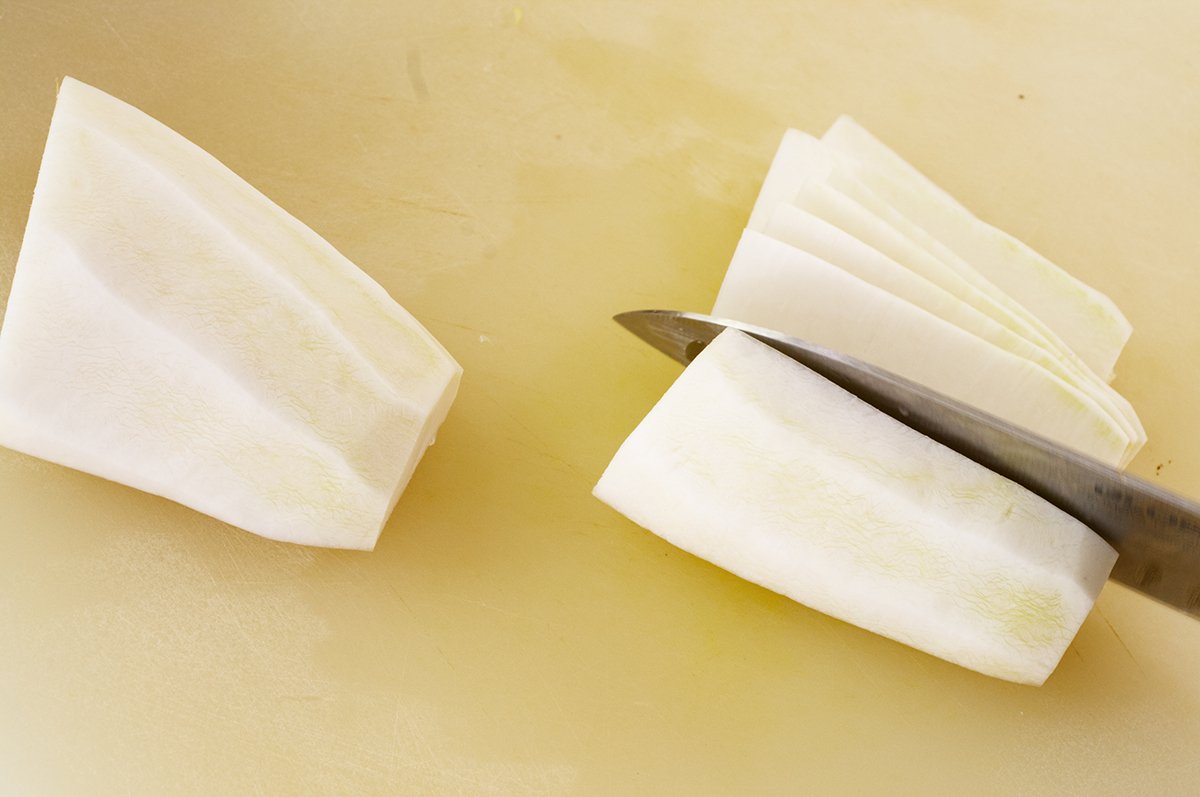
Then stack the slices and cut into matchsticks:
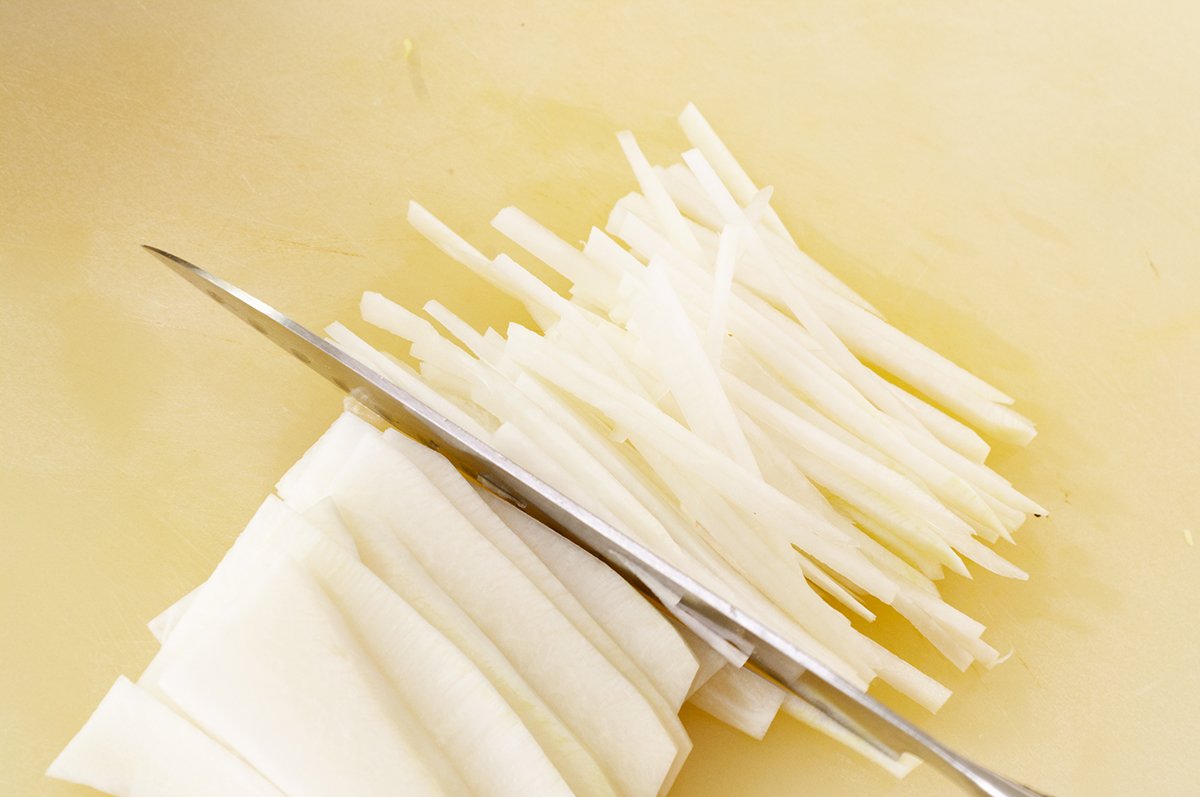
Alternatively, you could also use a mandoline for this if you prefer. The inexpensive Asian mandolines make quick work of julienning vegetables and that’s what we use to shred pounds of veggies when we make kimchi at the restaurant.

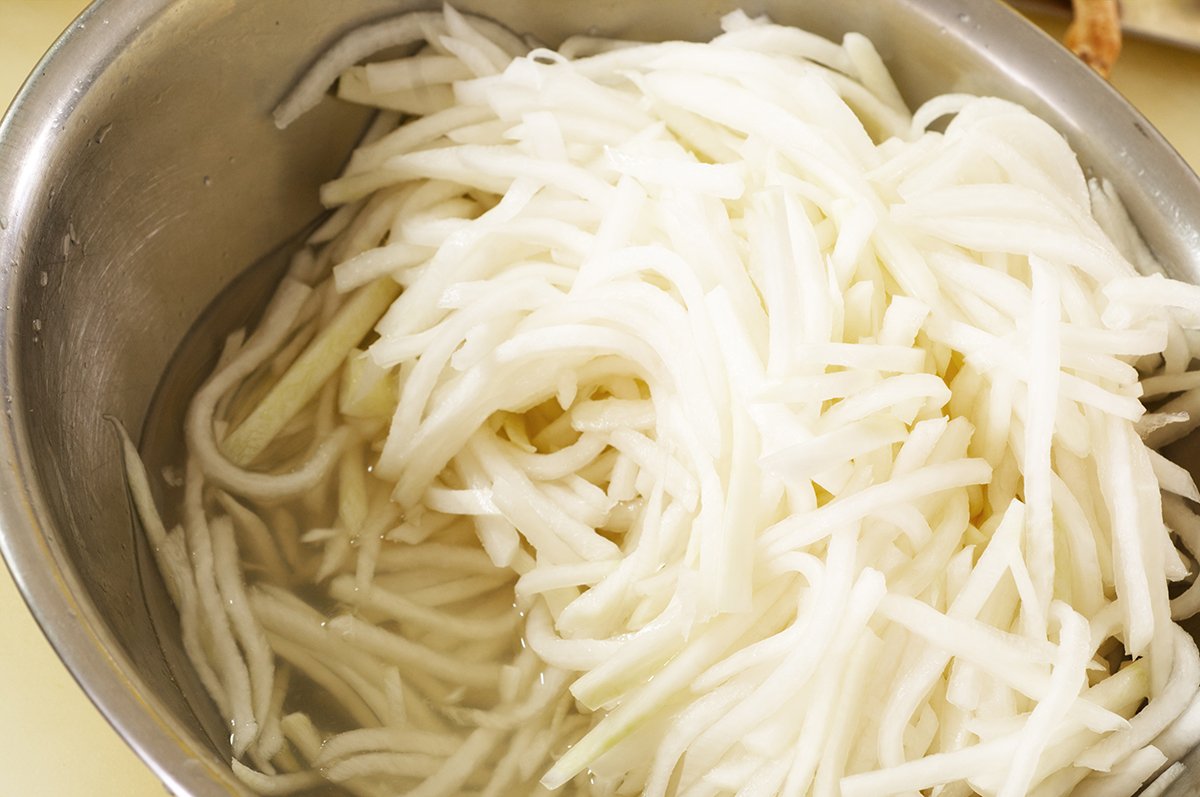
Once you have your lovely radish matchsticks, put them in a bowl, add the salt and sugar, and toss to combine. It will sit for 30 minutes, creating a brining liquid. Give it a stir now and again.
Some Like It Hot (and Funky)
Meanwhile, you will make the kimchi base. Garlic, ginger, fish sauce, scallions and gochugaru- all strong and assertive flavors on their own, but put them together and funky magic happens. First mix them all together in a large bowl:
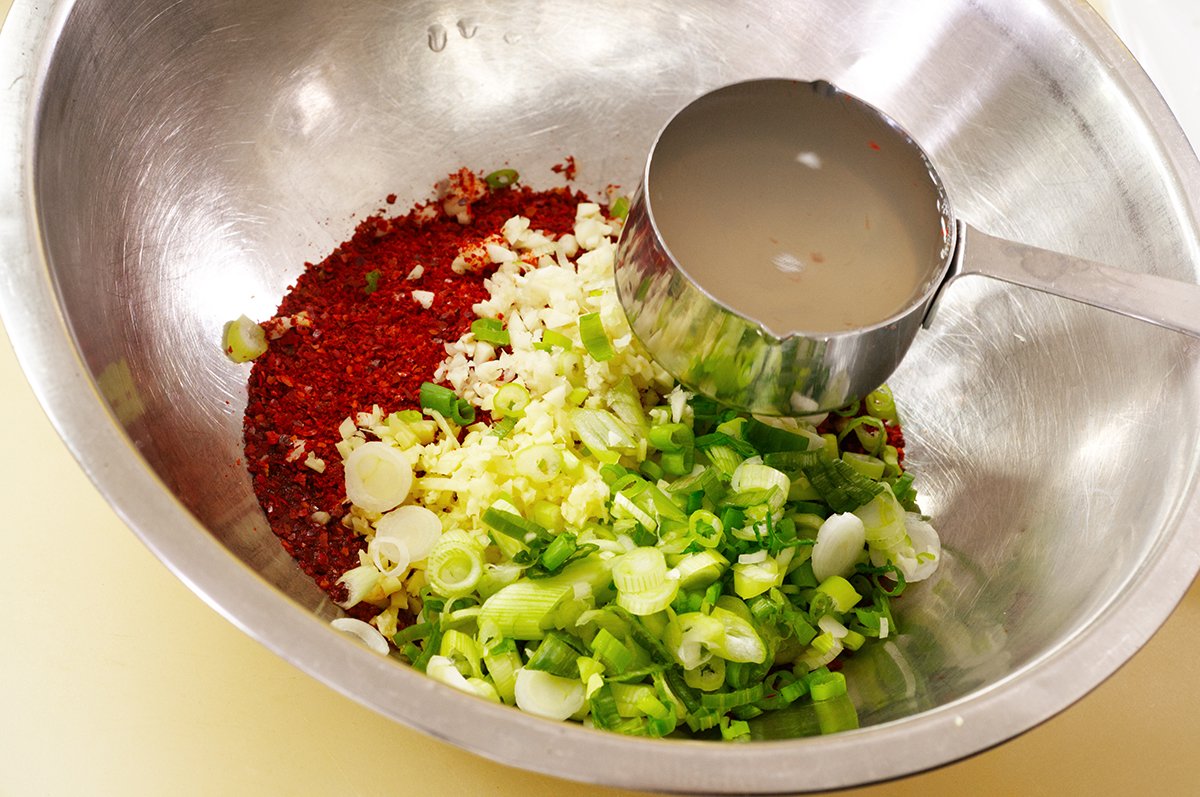
Then, you will scoop the radish out of its brine, and add the radish to the kimchi base.
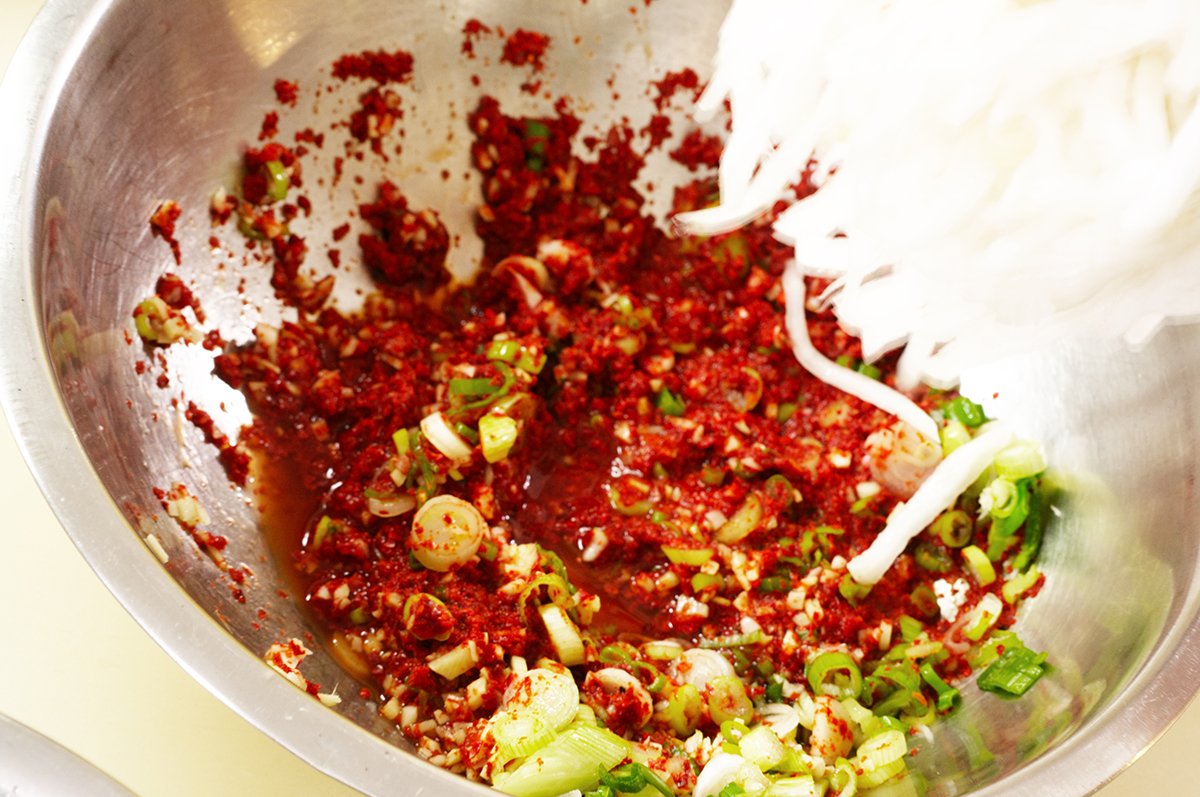
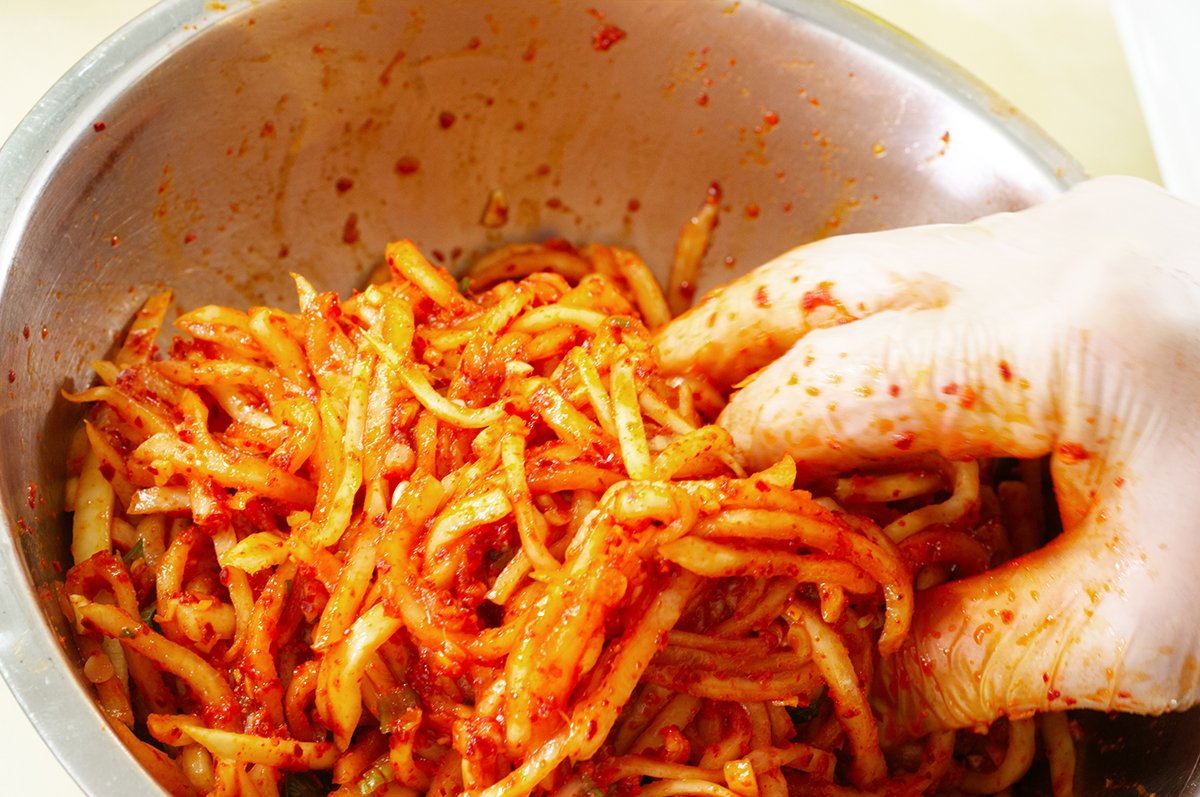
The best way to mix it all up is with your hands, but you definitely want to use gloves: not only to prevent the painful tragedy of accidentally rubbing your eyes with a chili flecked finger, but also because the Korean pepper flakes will dye your hands a bright red. Mix it for several minutes, making sure to get all the veggies at the bottom of the bowl coated with the spice mixture.
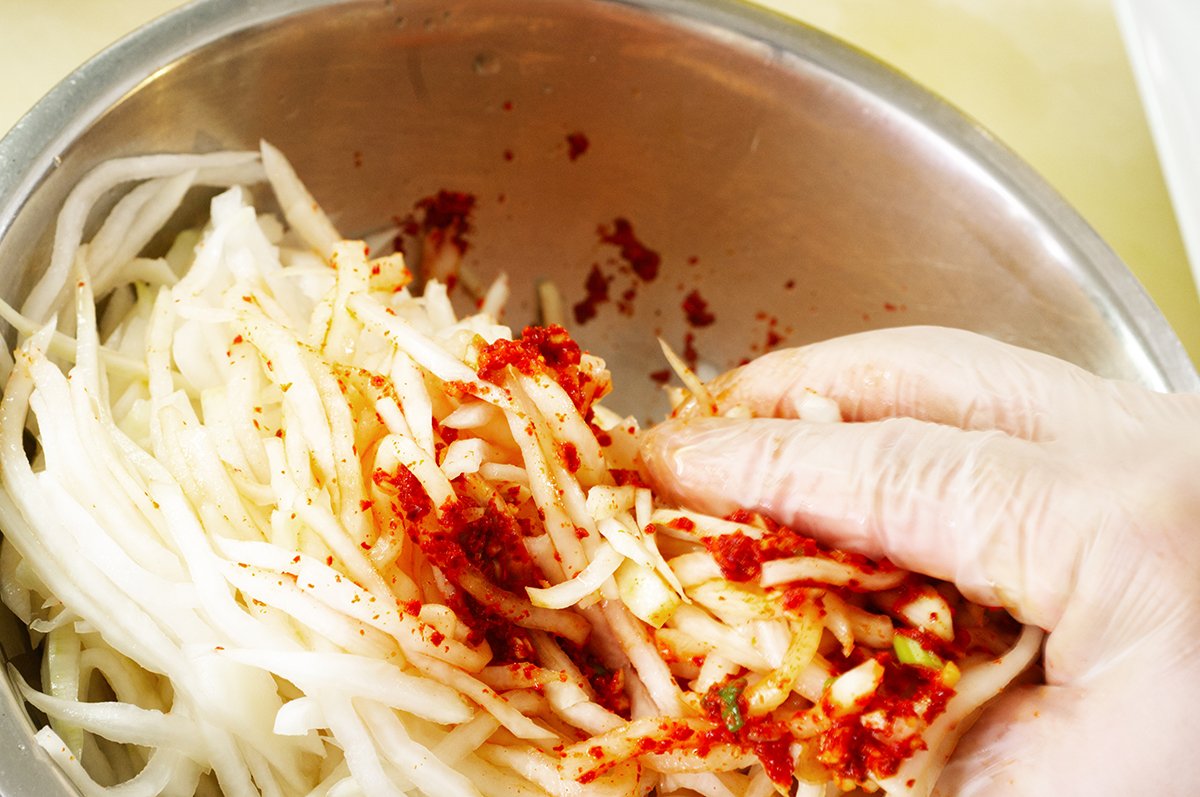
Mix it for several minutes, making sure to get all the veggies at the bottom of the bowl coated with the spice mixture:
Pack It Up!
Once your radish kimchi is thoroughly mixed, it’s ready to be ladled into clean jars. I use glass jars, because plastic ones will absorb the red color and it will never wash out. Frankly, you don’t need any special kind of fermenting jar; any glass jar with a lid will work. Fill the jar with the kimchi, leaving an inch at the top. It will expand as it ferments, so don’t let your (kimchi) cups runneth over. Really pack the kimchi down into the jar, so there are no air pockets that could lead to spoilage. Then use a paper towel to clean the headspace you left, and put on the lid.
Repeat with the remaining kimchi, and you’re done! You can enjoy it right away, as a fresh and flavorful salad. Or you can let it sit in the fridge where it will start to take on the characteristic funky and sour notes of fermented kimchi. Serve it alongside other vegetables dishes like my Korean Style Bean Sprouts and Funky Spicy Green Beans for a fun take on Meatless Monday. Or top a bowl of rice with Perfect Fried Eggs and some kimchi for a quick meal.

You are going to love Radish Kimchi, and I hope it opens up new doors of delicious fermented foods for you to enjoy! If you make it, we want to know. Leave a comment, or tag us in your pics @funkyasiankitchen, show us the goods!

Radish Kimchi
- Prep Time: 1 hour
- Total Time: 1 hour
- Yield: 8 servings 1x
- Category: condiment
- Cuisine: Korean
Ingredients
- 2 pounds korean radish (daikon is fine too)
- ½ Tablespoons kosher salt
- 1 ½ Tablespoon sugar
- 3 cloves garlic minced
- 1 Tablespoon peeled and minced ginger
- 2 scallions trimmed and chopped
- 2 Tablespoons fish sauce (substitute with soy sauce for vegans)
- ⅓ cup Korean hot pepper flakes (you can add less for milder tastes)
Instructions
Prep the Radish:
- Peel the radish and slice thin, stack and cut the slices into a julienne or thin matchstick. You can also use a mandoline and shred the radish.
- Put the radish into a bowl and add the kosher salt and sugar. Toss to combine. Set aside and let sit for 30 mins, tossing once or twice more.
Mix the Seasonings:
- In a separate large bowl, add the garlic, ginger, scallions, fish sauce, and Korean chile flakes. Mix well. When the radish has finished brining, scoop it out using your clean hands or a slotted spoon, and add it to the bowl of seasonings.
- Then measure out 2/3 cup of the radish juice. Put on a pair of disposable gloves and mix the radish with the seasonings and the juice, making sure to get to the bottom of the bowl.
Filling Kimchee Jars:
- Use a glass container (plastic will absorb the smell and color and you will never get it out) and scoop the radish kimchi into the container, making sure to push down on the kimchi to eliminate air pockets.
- Fill up your container, leaving a good inch at the top for the fermenting liquid to expand. Wipe down the bottle and add the lid. You can continue filling up another container in the same way if you are using smaller containers.
- You can eat it as is and it will taste more like a salad or you can put it into the fridge and start a slow fermentation where the kimchi will start to sour and ferment over the next week. Or you can do what I do, which is to leave the containers out on your kitchen counter overnight to kick start the fermentation. The kimchi will be a little bubbly at the top from the fermenting gases the next day. Then put the containers into the refrigerator.
Notes
* This kimchi will be good for at least 2 weeks in the fridge and will continue to get more sour as the fermentation continues. Make sure you use a clean fork or spoon to scoop out the kimchi. Do not use your hands as you may introduce bacteria into the container. Once you’ve taken your portion, push down on the kimchi to keep the contents submerged in liquid
Keywords: kimchi, radish, condiment


I’ve been making kimchi for years but never tried radish on its own—this recipe makes me want to change that. The tip about salting the radish properly is something I definitely needed, since mine always turns out too watery. Can’t wait to try this with my next batch of rice.
★★★★
Really enjoyed your write-up on “Radish Kimchi”. I especially liked the point about Kimchi has become something of an international sensation in the last few years. And … Very helpful and easy to follow.
★★★★★
Great post on “Radish Kimchi”—clear and practical. I especially liked the point about Kimchi has become something of an international sensation in the last few years. And … Thanks for sharing.
thanks
★★★★★
I’ve been wanting to try making radish kimchi at home, but I’m always a bit nervous about getting the fermentation time right. Do you have any tips for knowing when it’s perfectly ready to eat? Your step-by-step instructions make it seem much less intimidating—thanks for sharing this!
★★★★
I love how this recipe breaks down the fermentation process so clearly—I’ve been nervous about trying radish kimchi at home, but this makes it feel doable. Do you think using a different type of radish, like daikon, would change the flavor much?
★★★★
I’ve been wanting to try making radish kimchi at home, and your step-by-step breakdown makes it look so approachable. Do you think it’s okay to use a regular glass jar for fermentation, or is a traditional onggi container necessary for the best flavor?
★★★★
I’ve been experimenting with different kimchi recipes lately, and this radish version caught my eye. The step-by-step instructions are really clear—do you think it would work just as well with daikon radish that’s a bit older and less crisp? I’m excited to try this for my next batch.
★★★★
I’ve been looking for a good radish kimchi recipe that doesn’t rely too heavily on gochugaru, so this is perfect timing. The tip about salting the radish first to draw out moisture is exactly what I was missing in my previous attempts. Do you think this would work well with daikon radish from a regular grocery store, or does it need to be the Korean variety?
★★★★
This looks like a fantastic, straightforward recipe. I love how radish kimchi has that satisfying crunch that cabbage kimchi sometimes loses. I’ll definitely be trying this version next time my current batch runs out.
★★★★
This looks like a fantastic, straightforward recipe. I’ve always been a bit intimidated by making kimchi, but your step-by-step photos make it seem very approachable. I’m curious, how long do you typically let this version ferment before it reaches your preferred level of tanginess?
★★★★
It’s interesting how you recommend using shredded radish specifically because it makes the fermenting process happen more quickly. I always thought larger pieces were traditional for some reason, but faster fermentation is definitely a plus when I’m eager to enjoy the results!
I found it interesting that you prefer shredded radish for your kimchi because it ferments faster and is more versatile. That’s a great tip for someone like me who uses radish kimchi in various dishes like ramen or rice bowls.
I never would have thought about using shredded radish instead of cubed or whole for kimchi, but your reasoning about versatility and faster fermentation makes a lot of sense. Sounds like a great way to enjoy it more quickly and in different dishes I found this especially useful.!
I never would have thought about using shredded radish instead of cubed or whole for kimchi, but your reasoning about versatility and faster fermentation makes a lot of sense. Sounds like a great way to enjoy it more quickly and in different dishes.
I never considered shredded radish for kimchi before, but your point about it speeding up the fermentation process really caught my eye. That’s a great tip for anyone impatient, like me, to try their homemade batch sooner! I’m definitely going to give that a shot.
I never considered that using shredded radishes versus cubed or whole baby ones would make such a difference in versatility and fermentation time. It’s smart to think about how the kimchi will be used to guide that initial prep step. Definitely makes me want to try this version!
I never would have considered using shredded radish for kimchi, but your point about it being more versatile for toppings like ramen and salads makes perfect sense. And the quicker fermentation is definitely a bonus for eager eaters!
I’ve always been intimidated by the idea of making my own kimchi, but your step-by-step guide makes it seem so approachable. The tip about the fish sauce is something I never would have considered, and I’m excited to give this recipe a try this weekend.
★★★★
I’ve always been intimidated by the idea of making my own kimchi, but your step-by-step breakdown for radish kimchi makes it seem approachable. The tip about the brining time for the daikon is particularly helpful. I can’t wait to give this a try this weekend.
★★★★
I’ve always been intimidated by the idea of making kimchi at home, but your step-by-step breakdown for radish kimchi makes it seem so approachable. The tip about salting the radish to draw out moisture is one I’ll definitely be using. Can’t wait to try this recipe this weekend.
★★★★
I’ve always been intimidated by the idea of making my own kimchi, but your step-by-step photos make it look so approachable. The tip about using a bit of sugar to balance the funk is one I’ll definitely try in my next batch. Thanks for sharing such a clear guide!
★★★★
I’ve always been intimidated by the idea of making my own kimchi, but your step-by-step breakdown for radish kimchi makes it seem so approachable. The tip about the brining time for the daikon was especially helpful—I think that’s where I’ve gone wrong in the past. I can’t wait to give this a try this weekend.
★★★★
I’ve always been intimidated by the idea of making kimchi at home, but your step-by-step guide makes it seem so approachable. The tip about the rice flour paste for the right texture is something I’ve never seen before and seems like a game-changer. I’m excited to give this a try this weekend.
★★★★
This looks like a fantastic, straightforward recipe. I love how radish kimchi has that satisfying crunch that cabbage kimchi sometimes loses. I’ll definitely be giving this a try this weekend.
★★★★
I’ve always been intimidated by the idea of making my own kimchi, but your step-by-step photos make it look so approachable. The tip about the radish needing to be thoroughly dried is one I’ll definitely remember—that’s the kind of detail that makes all the difference.
★★★★
I’ve always been intimidated by the idea of making kimchi at home, but your step-by-step photos make it look so approachable. The tip about the radish releasing water and creating its own brine was particularly helpful—I think that’s where I’ve gone wrong in the past. Can’t wait to give this version a try this weekend.
★★★★
I’ve always been intimidated by the idea of making my own kimchi, but your step-by-step photos make it look so approachable. I especially appreciate the tip about the fermentation time for that perfect level of funk. Can’t wait to try this with the daikon from my local market this weekend.
★★★★
I’ve always been intimidated by the idea of making my own kimchi, but your step-by-step breakdown makes it seem so approachable. The tip about the rice flour paste for the right texture is something I’ve never seen before and seems like a game-changer. I can’t wait to give this a try this weekend.
★★★★
Hi- Thanks for asking. If you’re looking to make Napa cabbage kimchi, I would recommend that you try the real deal kimchi recipe instead. Cucumbers, chayote squash, or other crunchy juicy vegetables could be substituted for the radish, but Napa cabbage requires a different technique.
This sounds amazing and I hope you’re still out there to answer this. Can I use the same proportions and technique for nappa cabbage? Thanks!
Hi Aster- You can use the any kind of hard vegetable, such as cucumbers, turnips, or even carrots for the daikon radish. If you’re using something leafy and soft, like romaine lettuce, I would recommend thinking of your dish as more of a salad and serving it as soon as you’ve tossed the lettuce with the seasonings. Definitely eat it right away as it will start to wilt rather quickly. Thanks for your question and I’m glad you enjoyed the recipe.
This recipe is amazing!! I just made it with the daikon I purchased during the hmart sale
Question- I have a lot of Romaine heart lettuce. Can I use the same seasonings for the lettuce as well?
★★★★★
Thank you Holly! I love that you top burgers with it.
Love it!! Great easy recipe. I added some carrot for a little sweetness and it just took it to another level. We eat it right away and it never lasts 2 weeks but gets better every day that it sits in the fridge. So good on burgers!
★★★★★
Thanks for trying it Alice! Waiting is always the worst right?
Wow this radish kimchi recipe is similar to the one I currently use, I love the idea of cutting the radish into matchsticks so fermenting is quicker and we can start eating the kimchi sooner! I will definitely be trying your recipe when I make my next batch of kimchi, thanks for sharing ☺️
★★★★★
It is! Hope you give it a try
Great to hear. Let us know how it went.
Seems easy enough to try to make at home.
★★★★★
Have been super intimidated to make kimchi at home until NOW! Thanks for this recipe, can’t wait to try it!
★★★★★